

Key Takeaways
- The stand mixer ice cream attachment is the most practical entry point into homemade ice cream — if you already own a compatible mixer. At ~$80-$100, it costs less than most standalone machines and uses the motor you already have. The result is on par with $50-$100 standalone freezer-bowl machines, with the bonus of zero extra counter space.
- The freeze bowl must be frozen for a full 24 hours — not the "15 hours" listed as a minimum on the box. Do the shake test: if you hear liquid sloshing inside the bowl walls, it's not ready. An infrared thermometer should read 0°F (-18°C) or colder. This is the #1 factor separating creamy ice cream from soupy disappointment.
- Always start the mixer before pouring in the base. If you pour first and then start, the liquid can flash-freeze to the frozen bowl walls and jam the dasher. This is the golden rule that every experienced user learns — usually the hard way.
- You can only make one batch per bowl per day. The coolant thaws during the 20-30 minute churn and needs another 24 hours to re-freeze. If you want to make two flavors for a dinner party, you need a second freeze bowl or you need to start the day before.
- An overnight-aged custard base produces noticeably better texture than a same-day Philadelphia-style base. Aging in the fridge lets milk proteins hydrate fully, fat crystallize, and flavors meld — the difference is detectable even to casual ice cream eaters. But a well-made Philadelphia base (heavy cream, whole milk, sugar, salt, vanilla) still beats anything from a supermarket tub.
Homemade ice cream has a reputation problem. Most people think it requires a $300 compressor machine, a culinary degree, and half a day of stirring custard over a double boiler. The reality: you can make ice cream that's better than 90% of what's in the supermarket freezer aisle with a $100 attachment, four ingredients, and about 30 minutes of active time — most of which is waiting.
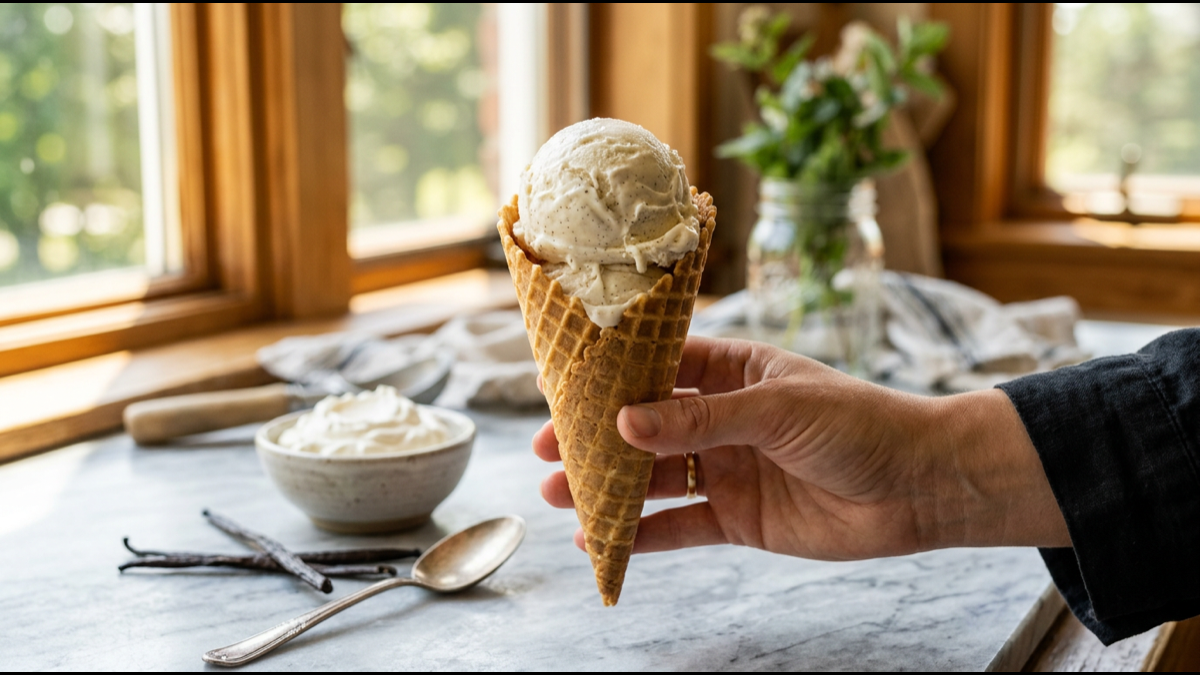
The attachment is a freezer bowl filled with a coolant gel. It connects to your mixer's power hub the same way a pasta roller or meat grinder does. The dasher (paddle) spins inside the frozen bowl, scraping the walls as your ice cream base freezes on contact. Twenty to thirty minutes later, you have soft-serve consistency. Four hours in the freezer after that, you have scoopable ice cream.
It's simple. But simple doesn't mean foolproof. The temperature window is narrow. The technique has specific non-negotiable rules. And the difference between "this is fine" and "this is the best vanilla ice cream I've ever eaten" comes down to a few decisions this guide will walk through.
How the Attachment Works (and Why Temperature Is Everything)
The ice cream attachment is a double-walled bowl with a proprietary coolant gel sealed between the walls. You freeze it — for a full 24 hours — and the gel drops to about -18°C (0°F). When you pour chilled ice cream base into the spinning bowl, the liquid freezes in a thin layer against the cold wall. The dasher scrapes that frozen layer off, mixes it back into the still-liquid center, and a new frozen layer immediately forms.
This scrape-and-mix cycle is what makes ice cream creamy instead of a solid block of frozen milk. It does two things simultaneously: it freezes the base while incorporating air (called "overrun"). The scraping action also breaks up ice crystals before they can grow large enough to be detected by your tongue — the difference between smooth and grainy.
The entire process depends on the temperature gradient between the bowl wall and the liquid base. When the bowl is fully frozen and the base is thoroughly chilled, the freeze happens fast, the ice crystals stay small, and you get smooth, creamy results. When either is too warm, the freeze happens slowly, ice crystals grow large, and you get icy, grainy ice cream.
This is the physics. Everything else in this guide — the rules, the chilling, the timing — exists to optimize this gradient.
Attachment vs. Standalone Ice Cream Maker
| Factor | Stand Mixer Attachment | Freezer-Bowl Standalone | Compressor Standalone |
|---|---|---|---|
| Price | $80-$100 (requires mixer) | $40-$100 | $200-$500+ |
| Counter space | None (uses mixer) | Small appliance footprint | Large, heavy footprint |
| Capacity | 2 quarts | 1.5-2 quarts | 1.5-2 quarts |
| Bowl freeze time | 16-24 hours | 6-24 hours | None (built-in compressor) |
| Back-to-back batches | No — re-freeze 24 hrs | No — re-freeze 6-24 hrs | Yes — unlimited |
| Texture quality | Smooth, soft-serve finish | Comparable to attachment | Slightly creamier (stable temp control) |
| Cleanup | Bowl hand-wash only | Bowl hand-wash only | Bowl often dishwasher-safe |
The attachment makes sense if you already own a compatible stand mixer and make ice cream occasionally — a few times a month in summer, once a month the rest of the year. It's the lowest-cost, lowest-clutter way to start.
A compressor machine makes sense if you want to make ice cream on impulse (no pre-freezing), plan to churn multiple batches for parties, or are serious enough about ice cream to justify $250+ and permanent counter real estate. The Breville Smart Scoop and Whynter models are the standard recommendations in this category.
A standalone freezer-bowl machine makes sense if you don't own a stand mixer at all. The Cuisinart ICE-21 (~$50) does the same thing as the attachment using its own motor. No reason to buy a $300+ mixer just to get a $100 attachment.
Compatibility: Does It Fit Your Mixer?
| Brand | Compatibility |
|---|---|
| KitchenAid (tilt-head, 4.5-5 qt) | Yes — official KSMICM attachment fits all current tilt-head models |
| KitchenAid (bowl-lift, 5-7 qt) | Yes — same attachment fits bowl-lift models |
| KitchenAid Mini (3.5 qt) | No — the attachment is too large for the Mini's power hub |
| KitchenAid Professional 5 Plus, K5SS, KSM5, KSM50, KSM500, KSM450 | No — older/specific models with different hub geometry. Check your model number. |
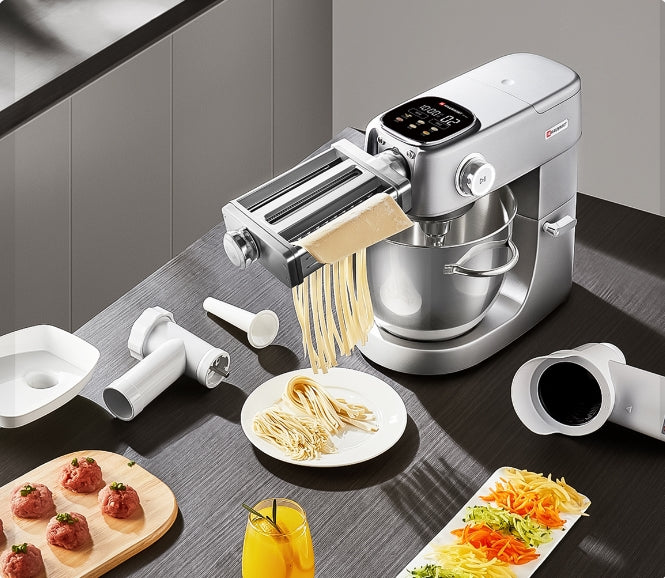
| Hauswirt M5max | Check hub compatibility — the M5max has a front power hub but uses a different attachment interface than KitchenAid |
| Other brands (Cuisinart, Kenwood, Bosch, Ankarsrum) | KitchenAid attachments do not fit. Check for brand-specific ice cream attachments. |
If you don't own a KitchenAid, third-party attachments like EZATO and GVODE offer dual-compatibility designs that fit both tilt-head and bowl-lift KitchenAid models, plus some Cuisinart mixers. Always verify your exact model number before buying — "universal" in the listing title rarely means truly universal.
The Two Base Styles: Custard vs. Philadelphia
Every ice cream recipe starts with one of these two foundations. The choice determines texture, richness, and how much work you do before the churn.
| Custard (French-Style) | Philadelphia-Style (Eggless) | |
|---|---|---|
| Eggs | 5 yolks per 3 cups dairy | None |
| Cooked? | Yes — temper yolks, cook to 170-175°F | No cooking required |
| Dairy ratio | ~1:1 cream to milk | ~2:1 cream to milk |
| Texture | Rich, dense, velvety, slow-melting | Lighter, cleaner, quicker-melting |
| Difficulty | Moderate — risk of curdling eggs | Beginner-friendly — just whisk and chill |
| Prep time before churn | Cook + chill 4-8 hrs (overnight ideal) | Chill 2-4 hrs |
| Best for | Vanilla, chocolate, caramel, coffee — flavors where richness is the point | Fruit, herb, floral — flavors you want to taste cleanly |
Start with Philadelphia-style if you're a beginner. No tempering, no risk of scrambled eggs in your ice cream, no straining hot custard. You can have a base ready for the fridge in 5 minutes. The trade-off is a slightly icier texture — Philadelphia bases freeze harder because they lack the emulsifying power of egg yolks.
Move to custard-style once you're comfortable with the churning process. The egg yolks contain lecithin, a natural emulsifier that binds water and fat into a stable matrix. This dramatically reduces ice crystal formation during storage. A properly aged custard base produces ice cream that stays scoopable and creamy for 1-2 weeks in the freezer, while a Philadelphia base may start developing noticeable ice crystals after 3-5 days.
Classic Base Recipes
Philadelphia-Style Vanilla (Beginner, 5 Minutes Active)
| Ingredient | Amount | Notes |
|---|---|---|
| Heavy cream (36% fat) | 2 cups | Don't substitute half-and-half — fat content matters for texture |
| Whole milk | 1 cup | Whole milk, not 2% or skim |
| Granulated sugar | ¾ cup | Superfine dissolves faster but granulated works |
| Vanilla extract | 2 tsp | Pure extract, not imitation. Or 1 vanilla bean, scraped |
| Kosher salt | ⅛ tsp | Don't skip — salt amplifies sweetness and flavor |
| Vodka (optional) | 1 tbsp | Lowers freezing point slightly; ice cream stays softer in freezer |
Whisk all ingredients together until sugar dissolves completely. Rub a drop between your fingers — if it feels gritty, keep whisking. Chill in the fridge for at least 2 hours (4 is better). Pour through the mixer with the dasher already spinning. Done.
Custard-Style Vanilla (Intermediate, 20 Minutes Active)
| Ingredient | Amount | Notes |
|---|---|---|
| Heavy cream | 1½ cups | |
| Whole milk | 1½ cups | |
| Granulated sugar | ¾ cup | Divided — half in dairy, half with yolks |
| Egg yolks | 5 large | Room temperature for easier tempering |
| Vanilla extract | 2 tsp | Or 1 vanilla bean steeped in the warm dairy |
| Kosher salt | ⅛ tsp |
- Whisk egg yolks with half the sugar in a medium bowl until pale and slightly thickened.
- Heat cream, milk, remaining sugar, and salt in a saucepan over medium heat until just steaming — small bubbles at the edges, not boiling. If using a vanilla bean, add it now and steep 10 minutes before proceeding.
- Temper the yolks: slowly pour about ½ cup of the hot dairy into the yolk mixture while whisking constantly. This warms the yolks gradually so they don't scramble.
- Pour the warmed yolk mixture back into the saucepan. Cook over medium-low heat, stirring constantly with a wooden spoon or silicone spatula, until the custard coats the back of the spoon — about 170-175°F. Draw a line through the custard on the spoon with your finger. If the line holds and no liquid runs, it's ready.
- Immediately strain through a fine-mesh sieve into a clean bowl set over an ice bath. This stops the cooking and catches any bits of cooked egg.
- Stir in vanilla extract. Cool to room temperature, then cover and refrigerate at least 4 hours — overnight is significantly better for texture.
Speed Settings and Churning Time
| Mixer Brand | Churning Speed |
|---|---|
| KitchenAid Tilt-Head | Speed 1 (Stir) — the lowest speed |
| KitchenAid Bowl-Lift | Speed 1 (Stir) |
| Hauswirt M5max | Speed 1 |
Churning takes 20-30 minutes for most bases. You're looking for soft-serve consistency — thick enough to mound on a spoon but not firm enough to scoop into a ball. If you hear clicking, the dasher's safety mechanism is slipping — that means the ice cream is done and the motor is protecting itself from over-torque. Stop and transfer to a container.
Do not churn beyond 35 minutes. The bowl's cooling capacity is finite. Beyond 30 minutes, the coolant has absorbed all the heat it can handle and the ice cream starts warming back up. Prolonged churning at this point beats air out and melts what you've frozen. If it's still liquid at 30 minutes, your bowl wasn't cold enough or your base was too warm. Transfer what you have to a container, freeze it, and learn for next time.
Step-by-Step: Using the Ice Cream Attachment
Day Before: Freeze the Bowl
- Place the freeze bowl in the coldest part of your freezer — the back of the bottom shelf, not the door. The temperature difference between the back and the door can be 5-10°F.
- Freeze for a minimum of 24 hours. Forty-eight hours is better if your freezer runs warm.
- Do the shake test before use: if you hear liquid sloshing, it's not ready. Not even a little bit. The gel must be completely solid.
Day Before or Morning Of: Prepare and Chill the Base
- Make your base and refrigerate. Custard bases: chill at least 4 hours, preferably overnight. Philadelphia bases: chill at least 2 hours.
- The base should be 40°F (4°C) or colder when you pour it in. A room-temperature base will not freeze properly, regardless of how cold your bowl is.
Assembly
- Remove the freeze bowl from the freezer. Attach it to the mixer.
- Attach the dasher (paddle) and drive assembly to the power hub. The dasher should sit inside the bowl with the scraper blades touching the bowl walls.
- Start the mixer on Speed 1 (Stir) first. The dasher must be spinning before any liquid enters the bowl.
- With the dasher spinning, slowly pour the chilled base through the opening in the lid. A steady stream, not a dump.
- Keep the mixer running. Check consistency after 15 minutes, then every 5 minutes after. Most bases finish between 20-30 minutes.
When It's Done
- The ice cream should look like soft-serve — thick, creamy, holding its shape on a spoon but not stiff.
- Transfer immediately to a pre-chilled, airtight container. A shallow, flat container freezes faster and more evenly than a deep one.
- Press a piece of parchment paper or plastic wrap directly onto the surface of the ice cream. This prevents ice crystals from forming on top.
- Seal the container and freeze for at least 4 hours — this "ripening" step is mandatory for scoopable texture.
Cleanup
- Let the freeze bowl come to room temperature before washing. Never wash it while it's still frozen — thermal shock can crack the internal seal.
- Hand wash the freeze bowl with warm, soapy water. Do not put it in the dishwasher — detergent and heat degrade the coolant seal inside the walls.
- The dasher and drive assembly are typically top-rack dishwasher safe, but hand washing extends their lifespan.
- Dry the bowl completely before returning it to the freezer. Water trapped on the surface turns to ice and can affect the seal on the next use.
The Science of Smooth Ice Cream: Fat, Sugar, and Air
Smooth ice cream isn't a mystery. It's three variables working together.
Fat (from cream and egg yolks) provides richness and body. Fat globules dispersed throughout the base physically interrupt ice crystal formation. More fat = smaller ice crystals = smoother texture. Heavy cream (36% fat) is the standard. Dropping to half-and-half (10-18% fat) will produce noticeably icier results. The sweet spot for homemade ice cream is 14-18% total butterfat in the finished base.
Sugar controls freezing point and softness. Sugar doesn't just sweeten — it depresses the freezing point of water. At standard ice cream sugar levels (14-18% of total weight), about half the water in your base never freezes solid at freezer temperature. This unfrozen water is what makes ice cream scoopable instead of a brick. Too much sugar and the ice cream stays soupy and never sets. Too little and it freezes rock-hard.
Air (overrun) provides lightness. The dasher whips air into the base as it freezes. Commercial ice cream can be 50-100% air by volume (cheap brands pump in more air — it's free volume). Homemade ice cream is typically 20-30% overrun, which is why it tastes richer and denser than most store-bought. The attachment's slow churn speed produces moderate, natural overrun — you're not going to accidentally make supermarket-style fluffy ice cream.
Optional: A Tiny Amount of Stabilizer
Commercial ice cream uses stabilizers (guar gum, xanthan gum, locust bean gum, carrageenan) at 0.1-0.3% of total weight to bind free water and prevent ice crystal growth during storage. You can replicate this at home:
- ¼ tsp xanthan gum or guar gum blended with the sugar before adding to the dairy. This tiny amount (about 0.5g per quart) is all you need. Too much creates a gummy, snotty texture.
- 1 tbsp corn syrup or glucose syrup replacing 1 tbsp of the granulated sugar. This adds different sugar molecules that interfere with ice crystal formation more effectively than sucrose alone.
- 1 tbsp vodka or other neutral spirit lowers the freezing point without adding sweetness. The alcohol is undetectable in the finished ice cream. Particularly useful in fruit-based flavors and sorbets where you don't want extra sugar.
None of these are required. A well-made, high-fat custard base with proper chilling and storage will stay smooth for 1-2 weeks without any stabilizer. But if you've been frustrated by homemade ice cream turning icy after 3 days in the freezer, try the corn syrup + guar gum combination.
Mix-Ins: When and How to Add Them
| Type | When to Add | Preparation |
|---|---|---|
| Chocolate chips / chunks | Last 1-2 minutes of churn | Freeze beforehand — room-temp chips melt surrounding ice cream |
| Nuts (toasted) | Last 1-2 minutes of churn | Toast, cool completely, then freeze. Chop to desired size. |
| Cookie dough / brownie pieces | Last 1-2 minutes of churn | Freeze solid beforehand. Cut into small, pea-sized pieces — large chunks freeze hard as rocks. |
| Fruit (fresh strawberries, peaches, etc.) | Cook down first, then add at end | Raw fruit has too much water — it freezes into icy chunks. Cook with a little sugar to reduce water content, cool completely, then add. |
| Fruit swirl (jam, caramel, fudge) | Layer in container after churning | Don't churn swirls in — they'll blend into the base. Layer into the storage container: ice cream, drizzle of swirl, ice cream, drizzle. Swirl with a knife once. |
| Crushed cookies / graham cracker | Last 30 seconds of churn | Add right at the end. Over-churning turns cookies to dust. |
The universal rule: everything that goes into the ice cream must be as cold as the ice cream. Room-temperature mix-ins melt the ice cream around them, which refreezes into a hard, icy halo around each piece. Freeze your chocolate chips, nuts, and cookie dough. Cool your fruit compote and caramel.
The 7 Most Common Mistakes
| Mistake | What Happens | How to Prevent It |
|---|---|---|
| 1. Bowl not cold enough | Base doesn't freeze. After 30 minutes, you have cold soup. If it eventually thickens, the texture will be grainy from slow freezing. | Freeze bowl 24+ hours. Shake test before use. Use an infrared thermometer — walls should read 0°F or colder. Store bowl in freezer permanently if you have space. |
| 2. Base not cold enough | Warm base immediately warms the bowl walls. Freeze happens slowly, ice crystals grow large. Grainy texture. | Chill base to 40°F or below. Overnight for custard, at least 2 hours for Philadelphia. |
| 3. Pouring base before starting the mixer | Liquid flash-freezes to the frozen bowl walls. Dasher jams. Motor strains. You have to disassemble and scrape frozen base off the bowl. | Always start the mixer first. Dasher spinning, then pour. |
| 4. Overchurning | Beyond 30-35 minutes, the bowl loses cooling power. Ice cream starts warming up and melting. Air is beaten out. Texture turns dense and greasy — the fat starts churning into butter. | Stop at 20-30 minutes or when soft-serve consistency is reached. If the dasher clicks (safety slip), stop immediately. |
| 5. Expecting hard, scoopable ice cream straight from the attachment | The attachment produces soft-serve. People who serve it immediately are disappointed by the texture. | The ripening step (4+ hours in freezer after churning) is mandatory for scoopable ice cream. Transfer to a flat, airtight container with parchment pressed on the surface. |
| 6. Using low-fat dairy | Substituting half-and-half, 2% milk, or skim milk for heavy cream and whole milk drops the fat content below the threshold for smooth texture. Result: icy, hard, uncreamy ice cream. | Use heavy cream (36% fat) and whole milk. If you want lower-fat ice cream, you need stabilizers to compensate for the missing fat. |
| 7. Trying to make two batches back-to-back with one bowl | After one batch, the coolant is thawed. A second batch won't freeze. You end up with flavored milk. | One batch per bowl per day. If you need two flavors for an event, buy a second freeze bowl or make one batch the day before. |
Troubleshooting
| Problem | Likely Cause | Fix for Next Time |
|---|---|---|
| Base won't freeze / stays liquid | Bowl not frozen long enough; or base too warm; or both | Freeze bowl 24+ hrs. Chill base overnight. Pour base at 40°F or below. |
| Icy / grainy texture | Slow freeze (bowl not cold enough, base too warm); or too little fat/sugar in recipe; or freezer burn during storage | Ensure bowl and base are fully cold. Use proper cream-to-milk ratio. Store with parchment pressed on surface in airtight container. |
| Soupy / never sets firm | Too much sugar or alcohol; or not churned long enough | Check sugar measurement — too much sugar depresses freezing point too far. For alcohol-based flavors, reduce sugar to compensate. |
| Greasy mouthfeel / butter texture | Overchurned — fat globules coalesced into butter | Stop at 20-30 min. If you hear the dasher clicking, stop immediately. Overchurning literally churns cream into butter. |
| Too hard to scoop after freezing | Too little sugar; or too little fat; or no alcohol/stabilizer in a Philadelphia base | Increase sugar slightly. Add 1 tbsp vodka. Switch to custard base for longer-term storage. Let sit at room temp 5-10 min before scooping. |
| Dasher jams / won't spin | Base poured before starting mixer; or bowl not properly seated; or dasher not locked onto drive | Always start mixer first. Check that bowl is fully locked in and dasher drive is engaged. |
| Blue/grey liquid leaking from bowl | Freeze bowl internal seal compromised — coolant gel is leaking | Not fixable. Replace the bowl. Never wash a frozen-cold bowl with hot water (thermal shock causes seal failure). |
| Plastic dasher / drive parts cracked | Ice cream froze too hard during churn and dasher couldn't slip; or dishwasher heat degraded plastic | Replace dasher. Hand wash plastic parts. Stop churning when soft-serve consistency is reached. |
Storage: How Long It Lasts and How to Keep It Creamy
| Storage Factor | Recommendation | Why |
|---|---|---|
| Container | Shallow, flat, airtight — not a deep tub | Shallow containers freeze faster and more evenly, minimizing ice crystal growth during the critical first hours |
| Surface protection | Parchment paper or plastic wrap pressed directly onto ice cream surface | Prevents freezer burn and surface ice crystals from air contact |
| Freezer temperature | 0°F (-18°C) or colder | Warmer freezers (many frost-free models cycle up to 10-15°F) accelerate ice crystal recrystallization |
| Freezer location | Back of the freezer, not the door | The door is the warmest, most temperature-fluctuating part of the freezer |
| Shelf life (custard base) | 1-2 weeks | Egg yolks provide natural emulsification that slows ice crystal growth |
| Shelf life (Philadelphia base) | 3-5 days before noticeable iciness | No egg emulsifiers = faster recrystallization |
Homemade ice cream has no commercial stabilizers or gums (unless you add them), so it doesn't last as long as store-bought. Eat it within a week for the best texture. If you need longer shelf life, either add a stabilizer or switch to a custard base.
FAQ
Is the KitchenAid ice cream attachment worth it?
Yes, if you already own a compatible KitchenAid stand mixer and make ice cream at least a few times a year. At ~$80-$100, it costs less than most standalone machines and produces results on par with $50-$100 freezer-bowl models — with the advantage of zero extra counter space. If you don't own a mixer, buy a standalone Cuisinart ICE-21 instead.
How long do you freeze the ice cream bowl?
Minimum 24 hours in the coldest part of your freezer. The box says 15 hours — ignore this. Do the shake test: if you hear liquid sloshing, it's not ready. An infrared thermometer should read 0°F (-18°C) or below on the bowl walls. Forty-eight hours is better if your freezer runs warm.
How long does it take to churn ice cream in a stand mixer?
20-30 minutes on Speed 1 (Stir). You're looking for soft-serve consistency — thick enough to mound on a spoon. Most vanilla bases finish around 25 minutes. Fruit-based flavors and lower-fat bases may take closer to 30 minutes. If it's still liquid at 30 minutes, your bowl wasn't cold enough.
Why is my ice cream not freezing in the attachment?
Two most likely causes: (1) the freeze bowl wasn't frozen long enough — needs 24+ hours, not the 15 hours listed on the box; (2) the ice cream base was too warm — must be 40°F or colder. If both are correct and it still won't freeze, the bowl's internal coolant seal may have failed (look for blue/grey liquid leaking).
Can you make two batches of ice cream back-to-back?
No. The coolant in the freeze bowl thaws during the 20-30 minute churn and needs another 24 hours to re-freeze completely. If you need two flavors for a dinner party, either buy a second freeze bowl or make one batch the day before and store it in the freezer.
Custard (French) vs Philadelphia (eggless) — which base is better?
Custard base produces richer, creamier, slower-melting ice cream that stays smooth in the freezer for 1-2 weeks. Philadelphia base is faster to make (no cooking, no tempering) and lets delicate flavors like fruit and herbs shine through more cleanly, but it freezes harder and develops ice crystals faster. Start with Philadelphia for ease, then try custard once you're comfortable.
Do I need to add stabilizers to homemade ice cream?
No — a well-made, high-fat custard base with proper chilling and storage will stay smooth for 1-2 weeks without stabilizers. But if your ice cream consistently turns icy after a few days, try adding ¼ tsp guar gum or xanthan gum blended with the sugar, or replace 1 tbsp of sugar with corn syrup. Both measurably reduce ice crystal growth.
Can the stand mixer ice cream attachment make gelato, sorbet, or frozen yogurt?
Yes. Gelato uses more milk and less cream (lower fat, served warmer). Sorbet is just fruit puree + sugar + water — churn the same way but expect a slightly longer churn time. Frozen yogurt uses full-fat yogurt + sugar + a splash of milk — churn and serve immediately as soft-serve for the best texture.
What to Do Next
If you're trying homemade ice cream for the first time, start with the Philadelphia-style vanilla base. It's five ingredients, five minutes of active work, and it's hard to mess up — the heavy cream carries the texture almost regardless of what you do wrong. Freeze your bowl for a full 24 hours, chill your base overnight, and don't skip the ripening step.
For more stand mixer recipes and techniques:
- 5 Essential Stand Mixer Recipes: Cookies, Bread, Pizza Dough, Cake & Whipped Cream
- Stand Mixer Mashed Potatoes: The Complete Guide — another hands-free side dish
- Stand Mixer Pie Crust Guide — the science of keeping butter cold for flaky pastry
- Stand Mixer Attachments Guide — every attachment explained, from the ice cream maker to the meat grinder
- Shop Hauswirt Stand Mixers — DC motor mixers with the torque and speed control for precision attachment work

